professional photography

professional photography

Wednesday, 30 December 2015

modeling photo shoot


 Professional studio biaora
Click BY: yash mewade
Model : Mustafa saisee
contact for photo-shoot .9827623818
I provide exclusive photography...
 Professional studio biaora
Click BY: yash mewade
Model : Mustafa saisee
contact for photo-shoot .9827623818
I provide exclusive photography...
 Professional studio biaora
Click BY: yash mewade
Model : Mustafa saisee
contact for photo-shoot .9827623818
I provide exclusive photography...
                                                      Professional studio biaora
Click BY: yash mewade
Model : Mustafa saisee
contact for photo-shoot .9827623818
I provide exclusive photography...
 Professional studio biaora
Click BY: yash mewade
Model : Zafar Saifee
contact for photo-shoot .9827623818
Professional studio biaora
Click BY: yash mewade
Model : Zafar Saifee
contact for photo-shoot .9827623818

Tuesday, 15 December 2015

6 TIPS TO IMPROVE YOUR PANNING PHOTOGRAPHY

Panning Tip #1: Aim small, miss small. This phrase is famous among shooting sports athletes.  It means that the smaller a point you train your focus on, the less movement you will be tolerant to.  You can apply this to panning photography and significantly improve the percentage of keeper shots you take.  Instead of aiming big and just trying to keep the bicyclist in the middle of the frame, aim small and try to keep the cyclist’s eye on one of your focus points.
Panning Tip #2: Use a flash on rear-curtain sync to freeze the subject.  This is not necessary all the time, but can certainly be a valuable method in some situations.
Panning Tip #3: Shoot when the subject is directly in front of you.  If you shoot while the subject is angled toward or away from you, the perspective will change slightly during the exposure, which will produce a less sharp subject.
Panning Tip #4: Use a monopod.  This will significantly improve the sharpness of the subject since the camera will not shake up and down.  (By the way, 
Panning Tip #5: Twist with your hips.  If you simply turn your head and arms rather than spinning at the trunk, you will be less steady and the photo will be less sharp.
Panning Tip #6: Do not trust the LCD.  Many of your panning shots will look sharp on the LCD, but it is almost impossible to determine if the photo is truly sharp without looking at the photo large on the computer.  Zooming in on the LCD can help, but I personally can never tell without seeing it large.

Sunday, 13 December 2015

mega tips


1 Select the raw image setting

Your EOS camera gives a wide range of image quality options, but to get the best results you should always go for uncompressed ‘raw’ files. Raw images reveal the best range of tones – and give greater flexibility when editing with software . It’s almost always worth the extra space raw files take up on your card.
Canon DSLR Tips: go large

2 Go large
Although you should use raw most of the time, there are occasions when it can pay to compromise with the JPEG options in the Quality menu. Choose the ‘Large’ high-quality JPEG option when shooting a series of continuous shots and your camera will keep firing for longer (check out these other 
Canon DSLR Tips: firmware updates

3 Firmware updates 

Canon continues to improve the reliability and performance of its cameras, even after they have left the factory. That’s why you should regularly check the latest ‘firmware’ available for your EOS camera. See which version you’re using in your camera’s menu (check out these 
Canon DSLR Tips: firmware updates

You can then  Download the latest version from this website along with the full installation instructions (the firmware loads onto your camera via a memory card).
4 Go Large to save memory card space
The high-quality Large JPEG setting is also a handy option if you’re running out of space on your memory card because you forgot to carry a spare.
5 Make the most of Live View
Live View, where you see what the camera ‘sees’ on the rear LCD screen, is found on all recent Canon 
EOS models (from the 40D onwards), but is switched off by default. You can enable it in the Live View Function Settings (find out .
The feature is useful for a wide range of subjects and lets you use the LCD to frame shots – it’s particularly useful when using your Canon on a tripod (learn  You can then turn it on and off  

Thursday, 10 December 2015

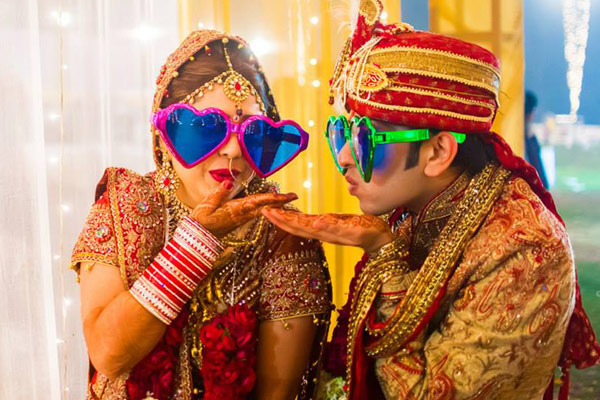
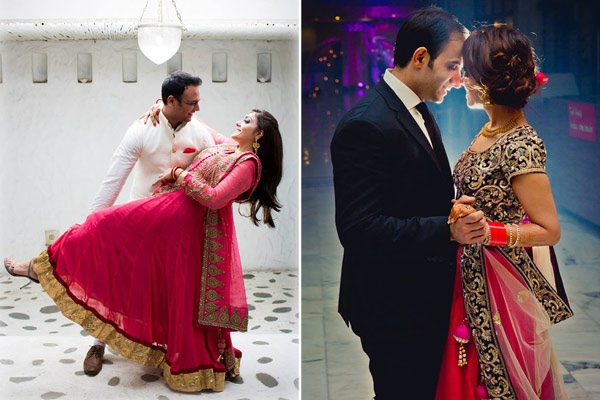
Get a little naughty

Get a little naughty

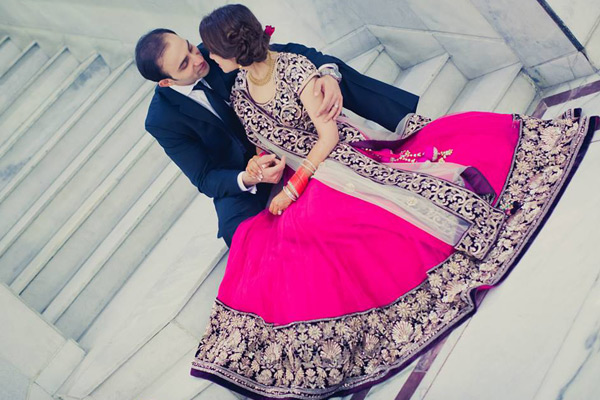
These can be some great additions to the wedding album. The photographer can click as many candid shots as the couple goes absolutely crazy and makes some fun, naughty, mischievous gestures.
Just like the poses above, these can either be planned or simply left for the moment to unfold naturally.

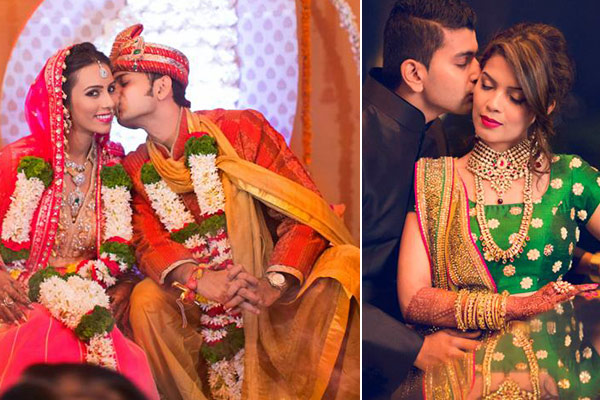
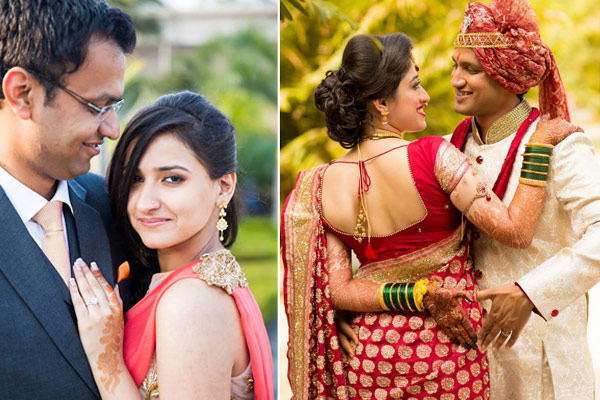
The first kiss

This is something new that is catching up among Indian couples, and is clearly inspired by western weddings. Capturing the couple’s first kiss can be a tricky task. The picture must look very romantic without appearing vulgar at all. For this, the photographer must be alert to click just at the right moment.

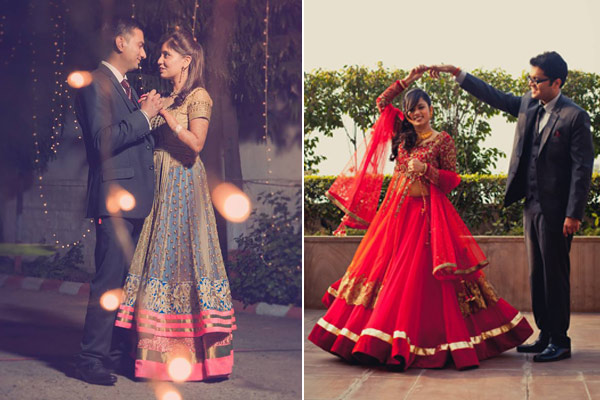
The dance of love

The dance of love

Y-This pose is soon getting very popular among brides and grooms. Capturing the perfect moments as the couple dances, shows the real talent of the photographer.

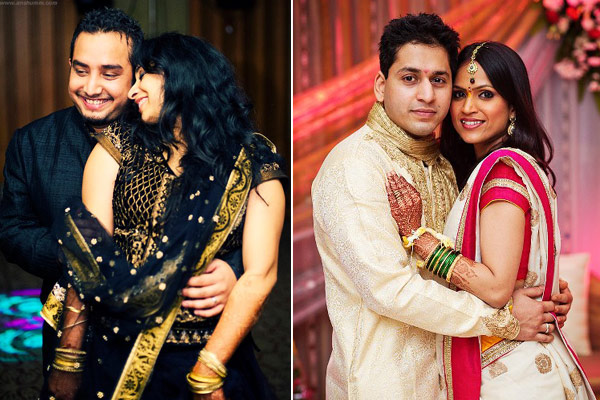
The romantic hug

The romantic hug

The hug is one of the most romantic and cute-looking wedding poses that a couple can have in their wedding album. It can either be a simple warm hug or the groom could hold the bride from the back.

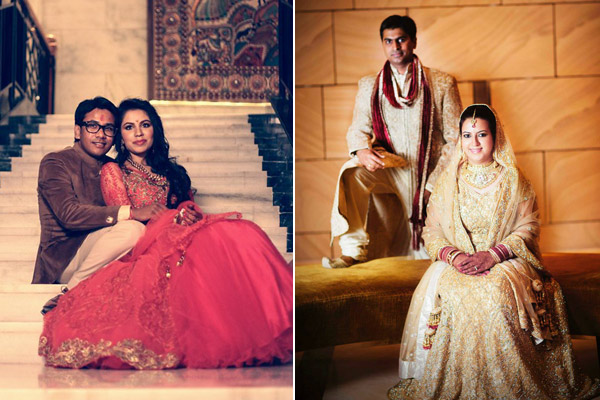
The classic sitting pose

The classic sitting pose

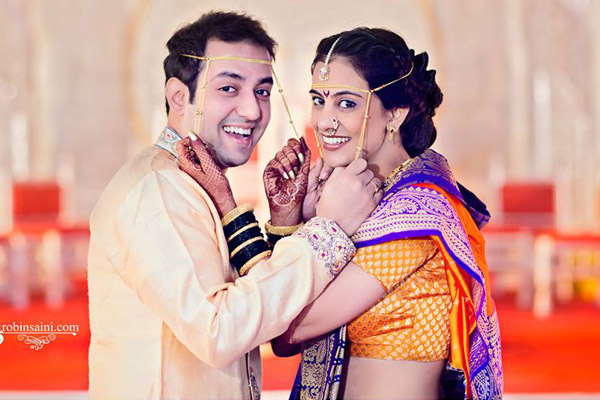
This is a must-have in any wedding album. The bride and the groom sit close to each other, and can choose a pose they love the most. It can be the bride resting her head on the groom’s shoulder, both holding hands, looking into each other’s eyes, or simply facing the camera with a smile.

Sunday, 29 November 2015


Manual Mode in DSLR Camera is considered to be an out-of-this-world setting that many people never ever think of trying it. I have come across many people who own DSLR Camera for many years but never tried. Most popular reason being that it requires them to have technical know-how of Aperture, Shutter Speed and ISO settings which has a steep learning curve.
If this reasoning rings a bell even for you, let us tackle it right here right now. You will see yourself playing  around with Manual Mode like never before within matter of few minutes.
I have used images of Canon Rebel T3i DSLR camera settings in this article. Most of the Canon DSLRs probably have very similar settings. If you are a Nikon DSLR owner, please read DSLR Basics: 8 Easy Steps to Learn Manual Mode for Nikon DSLR Cameras.
If you follow these steps exactly the way I describe, you will never have to switch back to Auto mode.
Beginners Guide to Photography. Free eBook on Photography for Beginners. Best Photography Free eBook. Written by Prathap


Want to learn photography? Download Beginner’s Guide to Photography.

Step 1: Pick up your Camera and Start the Timer

This is the most important step. If you are just reading it in your office, or a restaurant, or a coffee shop, then no matter what, you will never learn it. If you do not have access to camera right now, then stop it here. Go back home, pick up your camera and then follow the next steps.
Start the timer now. Let us see how much time you will take to understand the manual mode.

Step 2: Turn the Mode dial to point to M which means Manual Mode

Rotate the mode dial, which is usually at the top right hand side, to point to M . Some of the models may have the mode dial at the top left hand side.
Mode Dial to choose Manual Mode in Canon Rebel T3i DSLR

photography tips

tep 3: Point the Camera where you find good light

This is very important step. Do not ignore this step. Turn on the camera if you have not done it already and point it towards a subject/object which has sufficient amount of light. Keep the camera on a stable surface to make sure the composition does not change.

Step 4: Check the Important Camera Settings

Press the disp button which will display current settings in the LCD.
Display button on Canon Rebel T3i DSLR to get Camera settings on the LCD
Press the display button to get Camera settings on the LCD screen. Image shown is for Canon Rebel T3i DSLR .
Note: After a few seconds LCD screen display turns off, press disp button to get it back.
You will see too many settings there. As of now, we are interested only in Aperture (F number) and ISO.
Aperture setting and ISO settings displayed on the LCD screen of the Canon Rebel T3i DSLR
Image on the left shows the Aperture value which is circled in red. Images on the right shows the ISO value which is circled in red.
If you have never before touched the manual mode, then you should see F number to be very small like f/2.8, f/3.5, or f5.6.  If not, press Q (Quick Mode) button then traverse to aperture setting with F number. Turn the top dial towards your left until there is no change in F number.
Quick Mode selection button on Canon Rebel T3i DSLR, to select Shutter Speed, Aperture and ISO
Press on Quick mode button and use the right arrow to move to Aperture setting (the F number). Choose the minimum Aperture value for your lens.
If ISO value is 100, which is the least value, then you are good. Otherwise, press Q button then traverse to aperture setting with ISO number. Turn the top dial towards your left until you get the lowest ISO number usually 100.
Quick Mode selection button on Canon Rebel T3i DSLR, to select Shutter Speed, Aperture and ISO
‘ Press on Quick mode button and use the right arrow to move to ISO setting. Choose the minimum ISO settings possible.

Step 5: Check the Camera Metering indicator

Check the camera metering indicator which displays a dotted line with -3 and +3 on either side of the line.
Camera Metering mode which shows if an image is overexposed or underexposed.
Camera Metering mode which indicates if there is enough light or too much light. Left image indicates that there is less light (underexposure) and the right image indicates that there is more light (overexposure)
If you half-press the shutter button, you will also notice a blinking indicator either to the -3 side or to the +3 side of the dotted line. It is fine whichever way it is currently pointing to since you will learn in few minutes to deal with it.
Learn about Camera Metering Modes to achieve proper exposure under all conditions.

Step 6: Press the Shutter button

Press the shutter button. I mean it…just do it.
This is an important aspect of learning. Take action, make mistakes, learn from mistakes. If you learn only the right way of doing things, as the time passes, you will be scared to test anything else.
Now let us talk about the picture you took.
You are probably not impressed with what you got. May be it is not what you expected? Let us analyze it then.
Is it very dark? then it is underexposed, because of less light hitting the sensor. It means the meter indicator was towards -3.
If the picture is bright or washed out, then it is overexposed, because of too much light hitting the sensor. It means the meter indicator was pointing towards? you know that.
You might already have solved the problem in your head now. Have you? you know what to do, isn’t it? Do it.

Step 7: Achieving the Proper Exposure

Press the disp button again to get back to the settings on the LCD screen.
If the picture was underexposed or the arrow is pointing towards -3, then turn the main dial towards your left (counter-clockwise direction).
Image showing main dial in Canon Rebel T3i DSLR which is used to change Aperture, Shutter Speed and ISO get the perfect exposure.
The main dial which is used to change Aperture, Shutter Speed and ISO get the perfect exposure.
As you turn it left, you will notice that the blinking indicator below the dotted line comes closer towards center. Keep turning the dial in counter-clockwise direction until the blinking indicator hits the center (0 marking) of the dotted line.
Camera Metering Indicator which helps to determine the perfect exposure.
Image on the left shows that there is very less light, which means the resulting photograph will be underexposed. Image on the right shows the proper exposure.
If the picture was overexposed or the arrow is pointing towards +, then turn the dial, towards your right (clockwise direction).

As you turn it right, you will notice that the blinking indicator below the dotted line comes closer towards center. Keep turning the dial in clockwise direction until the blinking indicator hits the center (0 marking) of the dotted line.
Camera Metering mode helps to determine how much light is necessary to get the perfectly exposed image.
Image on the left shows that there is too much light, which means the resulting photograph will be overexposed. Image on the right shows the proper exposure.
In Steps 6 and 7, you changed the Shutter Speed to achieve the proper exposure. Shutter speed is represented in seconds. Generally it will be in fraction of seconds like 1/30 or 1/60 all the way upto 1/4000 or 1/8000.
In all possibilities, you should get the arrow to point to center unless you have chosen a subject which is way too dark or way too bright.

Step 8: Make your very first Photograph using Manual Mode!

Press the shutter button now. Did you get the picture what you were longing for?!
Congratulations! on your very first photograph using manual mode. You have taken control of your camera, there is no turning back from here.
Stop the timer now. How much time did you take to learn? Was it hard to learn?
Want to get more simple photography tips like this? Beginners Guide to Photography. Free eBook on Photography for Beginners. Best Photography Free eBook. Written by PrathapDownload Beginner’s Guide to Photography.
Did you enjoy this article? Do you want to know about some other concept that is haunting you from a long time? Let me know in your comments.

How to photograph moving objects

by yash mewade


OK so you've grasped the idea of how to take a good photo with your digital SLR camera, and now want to know how to photograph moving objects. Whether you are photographing an object such as moving water or a car driving past you, or a subject as in a person, child or animal, the camera technique and settings are basically the same.
The main camera setting you need to take notice of when shooting moving objects is the shutter speed. This is best done by putting your camera on shutter priority and looking through your rear viewfinder, pressing your shutter button half way down, then look along the edges of the inner screen for a number that resembles either a fraction such as 1/125 (maybe not that exactly but a fraction nethertheless) or for more recent cameras just a plain number like 125 that changes when you turn the main dial. If you see a plain number then that number in reality refers to a fraction, so for example 125 refers to 1/125th of a second etc. If you are a beginner and are unsure how to change your cameras shutter speed, then I recommend looking in your trusty camera manual ;)
It's important to understand that when it comes to photographing moving subjects every situation is unique. No one can tell you exactly what shutter speed to use. However there are guidelines as to what speeds you should start with, then change it up or down from there depending on the result. Here is what I've found from personal experience with different subjects.

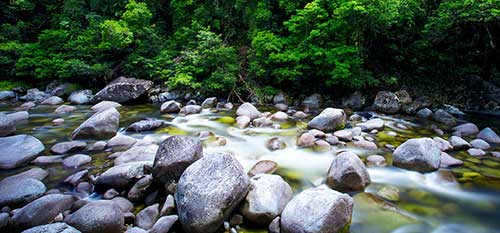
How to photograph moving water

moving water
When photographing water and I want to slow down the movement I always start with a shutter speed of 1/8th of a second. I'll take a few test shots, look at the results then slow down from there, trying 1/4, 1/2 and so forth until I see the result I'm after.
The reason why it's a matter of experimentation is because no two situations will have the exact same available light. For instance you could have a similar scene to my forest above, however your lighting situation could be sunnier or darker than when I shot this image with a shutter speed of 80 full seconds. As I said, start with 1/8th of a second then adjust your settings from there.
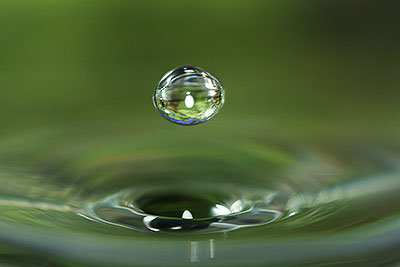
If on the otherhand you want to freeze motion like this water drop below, then I recommend starting with a much faster shutter speed of 1/160th of a second, check the results then change it to a faster fraction if needed. For this image below I ended up being happy with 1/200th of a second. Not as fast as you'd think.
water drop

How to photograph moving people

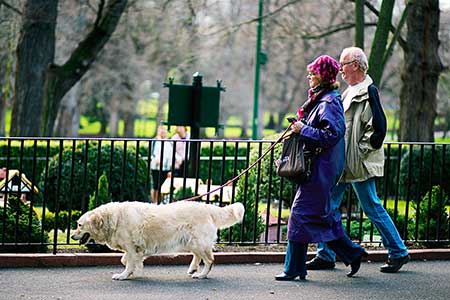
Now lets move on to people. When photographing moving people I recommend starting at 1/125th of a second for walkers if you want to capture them in sharp focus. If on the otherhand the aim is to blur the person walking then set a slower shutter speed starting your experiment with 1/30 second.
people moving
If you are photographing a marathon or people running and you want to capture the person in sharp focus, then begin with a shutter speed of 1/ 250 sec and adjust from there. To blur a running person start with 1/60th of a second. Use similar camera settings when photographing children on the move.

How to photograph a moving car

To capture a racing car in sharp focus start with 1/1300 sec. Chances are though you'll want to show movement when photographing a moving car. To blur a moving car travelling at 30 mph set a shutter speed of 1/125th of a second. If the car is travelling at 70 mph then setting a speed of 1/250th of a second will result in moderate movement or blur.
You may also be interested in this post: How to photograph car light trails.
However the best car action shots usually incorportate a photography technique called panning which we'll discuss next.

Shutter speed settings for panning

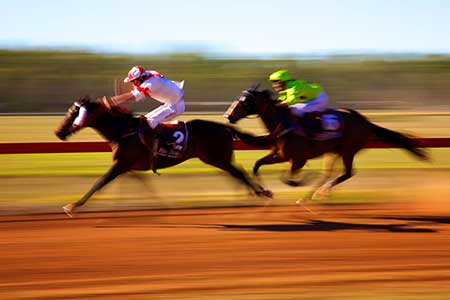
Panning is another way to show intentional movement. Panning with the moving object will result in background blur while the object itself stays in sharp focus. For panning I recommend starting with 1/60th of a second shutter speed. If you are a beginner I don't recommend going any slower than 1/60th of a second. Panning at 1/60th of a second is much easier than panning at a slower speed of 1/4th of a second.
As you can see by the image below 1/60 second is a perfect camera setting for panning with a horse. Note, when you pan with a horse, you'll still see movement in the animals legs or the jockies up and down movement.
panning with a moving object
If you want to blur the actual horse, set 1/30th sec for a trotting horse or 1/125 sec for a galloping horse. If you want to photograph a moving horse in sharp focus, set 1/800 sec.
There you have it, all I know about photographing moving objects. Remember to experiment with both fast and slow shutter speeds, or try a bit of panning. But most of all have fun with your photography. 

photography tips

Manual Mode in DSLR Camera is considered to be an out-of-this-world setting that many people never ever think of trying it. I have come across many people who own DSLR Camera for many years but never tried. Most popular reason being that it requires them to have technical know-how of Aperture, Shutter Speed and ISO settings which has a steep learning curve.
If this reasoning rings a bell even for you, let us tackle it right here right now. You will see yourself playing  around with Manual Mode like never before within matter of few minutes.
I have used images of Canon Rebel T3i DSLR camera settings in this article. Most of the Canon DSLRs probably have very similar settings. If you are a Nikon DSLR owner, please read DSLR Basics: 8 Easy Steps to Learn Manual Mode for Nikon DSLR Cameras.
If you follow these steps exactly the way I describe, you will never have to switch back to Auto mode.
Want to learn photography? Beginners Guide to Photography. Free eBook on Photography for Beginners. Best Photography Free eBook. Written by PrathapDownload Beginner’s Guide to Photography.

Step 1: Pick up your Camera and Start the Timer

This is the most important step. If you are just reading it in your office, or a restaurant, or a coffee shop, then no matter what, you will never learn it. If you do not have access to camera right now, then stop it here. Go back home, pick up your camera and then follow the next steps.
Start the timer now. Let us see how much time you will take to understand the manual mode.

Step 2: Turn the Mode dial to point to M which means Manual Mode

Rotate the mode dial, which is usually at the top right hand side, to point to M . Some of the models may have the mode dial at the top left hand side.
Mode Dial to choose Manual Mode in Canon Rebel T3i DSLR

How to photograph people jumping

How to photograph people jumping

by yah mewade
Photographing sharp images of people jumping isn’t as hard as it seems if you follow these few simple rules. In this tutorial I’ll show you my best tips for capturing jumps without the use of a flash.
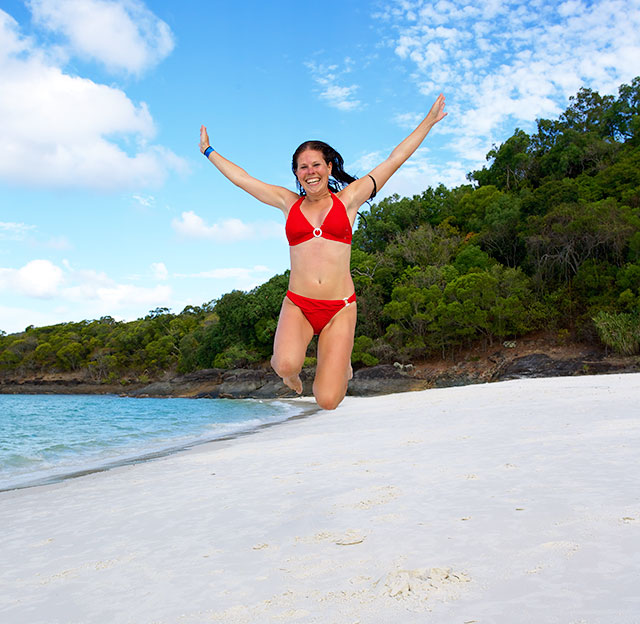
Here is an example image shown below that I photographed a couple of months back of a friend jumping on a local beach. The only editing I’ve done is to crop the image for internet viewing. It really was this sharp straight out of the camera. Several were so sharp they almost looked superimposed!
girl jumping on beach
So how did I take this shot? Firstly I sat on the ground so the jump seems much higher that it actually was. Your model will thank you for it later on.
Camera settings for one person jumps
When photographing one person jumping, I always set my DSLR camera to shutter priority. This allows me to concentrate on the speed of the shot and the camera adjusts other settings to suit. The shutter speed is the most important setting for capturing the person nice and sharp. I find a speed of 1/400th of a second works every time.
Camera settings for groups of people jumping 
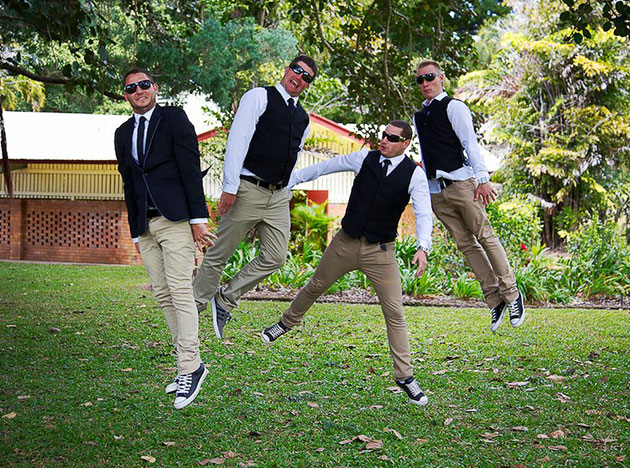
When photographing two or more people jumping, I use aperture priority, yet still keep my attention on the shutter speed. Why aperture priority? There is no use photographing a group of jumpers if only one person is sharply focused. Hence I set my aperture to f/5.6 following the rules on aperture settings for portraits.
group of people jumping
Here is my technique for groups
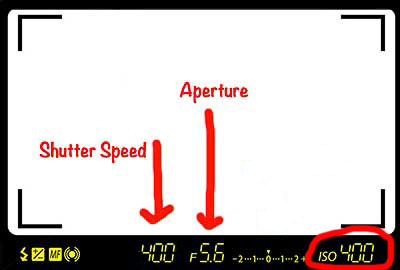
Set your camera to aperture priority and choose an aperture of f/5.6. Before the group starts jumping, press your shutter button half way down while looking through the viewfinder and you’ll notice camera settings listed along the edges of the screen light up. Take note especially of the shutter speed. If the shutter speed is 1/400th of a second or faster then you are ready to shoot. If not, up your ISO to a higher number. Personally I increase my ISO by 100 at a time and try again, adjusting from there until the shutter speed is showing as 1/400th of a second minimum.
DSLR camera settings
Auto Focus
Keep the focal switch on the side of your lens on AF. Obviously you won’t have time to manually focus.
Focal Points
Personally I like to set a middle single focal point. This set up will ensure you can easily find the focal point and focus on the person as they start their jump. If you are not sure what I mean by focal points, then read this article on how to focus DSLR cameras.
Continuous Shooting
I set my camera to continuous shooting, also called burst mode on some DSLR cameras.  Continuous shooting will allow you to take several shots or more per second. Your camera will keep shooting, as long as your finger holds down the shutter button. Note, cameras do limit how many you can take in any one burst until it needs to clear its cache. So if you hold your finger down on the shutter and it suddenly stops shooting, this is perfectly normal. That is your camera telling you it needs to catch up!
Pre-focusing
If the person is jumping up and down in the same spot, what you can do is pre-focus before they leap. It’s important that they don’t change their distance from you when they jump. i.e don’t jump forward or back. For these types of shots, I sometimes press my shutter button half way down to pre-focus, then ask them to jump as I press the rest of the shutter and take several burst shots.
Should you move the camera up and down with the jumper?
Until you perfect the technique it’s best to keep your camera steady in one place. Therefore don’t zoom in too far that you cut the persons head off when they are at the top of their jump. Once you have perfected these camera settings and technique, you can then try panning up and down with the person to show motion in the background.

How to focus for landscapes

How to focus for landscapes

by  yash mewade
How do I focus for landscape photography and what exactly does it mean when someone says ‘focus one third into the scene’?
This is a question a beginner photographer asked me recently and to be honest it’s something I’d wrongly presumed everyone understood how to do.
landscape focus example
When photographers shoot typical landscapes, they are generally wanting a wide angle image with as much focus as possible from front to back. This is when they often set a large aperture number, for example anywhere between f/11 and f/22, then focus one third into the scene before taking the shot. Ok, now what does that mean exactly!
For starters you need to set your camera to a single focal point and know how to switch between them. If you don’t understand how to do this, I suggest reading your camera manual or these tips on focal points.
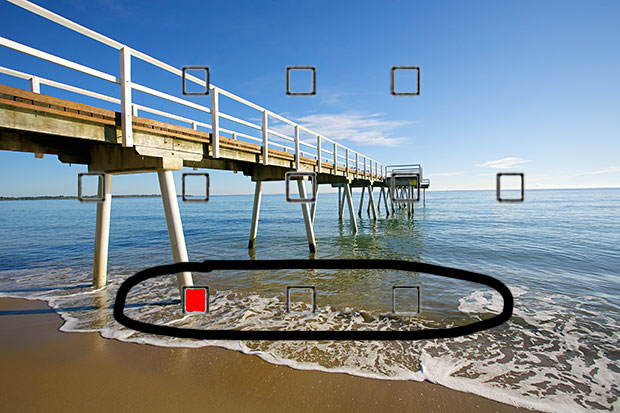
To focus one third into the scene I look through my rear vision and choose one of the bottom focal points. Similar to the example image below.
how to focus for landscapes
Note: For the focal points to light up you need to press your shutter button half way down. Then you will be able to switch between points, choosing one that is roughly 1/3rd of the way up from the bottom of an image.
The depth of field extends roughly from 1/3 in front to 2/3 behind the focus point when shooting landscapes with this technique. Therefore in this example shown above, everything from the sand in the foreground to the end of the wharf and horizon is in focus.
What would happen if I focused on the horizon?
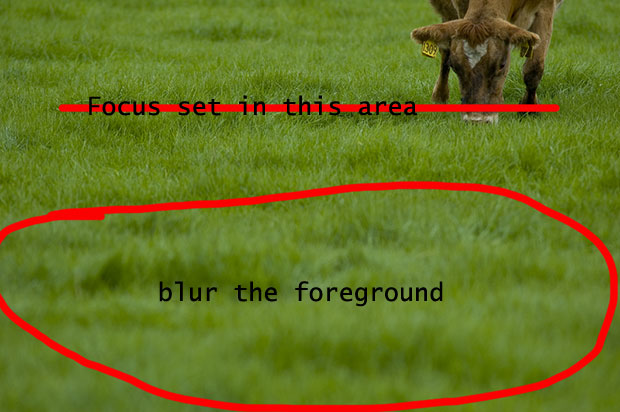
If I were to focus on the horizon, the incoming wave in the foreground and the shine of the sand would have appeared much softer and therefore not as sharp. Many photographers use this technique to their advantage when photographing country sceneries for example and they want foreground grass to appear blurred like the image shown below.
where to focus to blur foreground
Remember, where you focus affects what areas of the landscape are seen in sharp focus, and what areas are blurred. For wide angle landscapes use the rule of focusing 1/3rd into the scene coupled with a high aperture f-number for sharp shots.
What does sharp focus really mean?
I recently had a beginner photographer say to me, ‘when I look at my images in full size, the trees on the mountains are never sharp, especially when I crop to the trees’. What this photographer meant was, the image isn’t properly focused because there is no details seen in the trees on the horizon. This is actually normal for DSLR cameras. They work very much like our eyes. Details are much more apparent on nearer objects than those much further away in distance.
Take the first photo on this page for example. With my own eyes I could see the ripples in the sand, but not the details of the trees on the far mountains. Therefore don’t expect your DSLR camera to show details either when cropping the image to the trees. It doesn’t mean the image isn’t sharply focused from front to back, it simply means just like your eyes, that is exactly how the camera saw this particular landscape.

Best aperture setting for portraits photography

Best aperture setting for portraits

by yash mewad
Here I share with you my aperture settings when photographing portraits. As a professional photographer I have gained much knowledge over the years on what aperture settings are best for specific situations.
Generally speaking when shooting portraits, photographers want to isolate the person and nicely blur the background. Unless you are shooting a holiday snapshot, the background is normally unimportant. Therefore that’s what I’ll focus on in this post.
Quick Formula Rules 
best aperture for portraits
If I’m photographing one person I use the lowest aperture number my lens will allow, which is normally f/2.8. Note, not all lenses go that low, but good portrait lenses do!
aperture settings for group portraits
When photographing two or three people, I change my camera’s aperture setting to f/4
Four or more people, I set f/5.6 aperture.
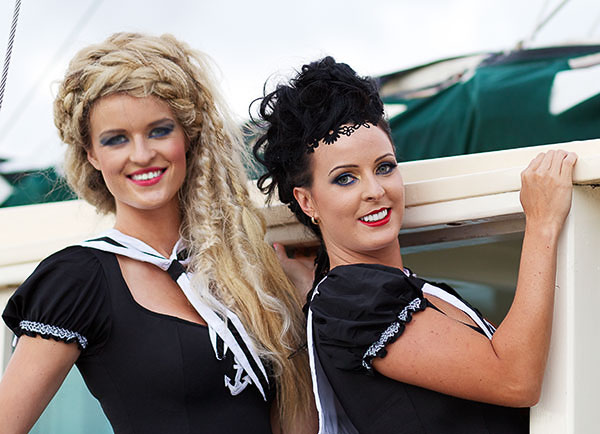
When photographing portraits, it’s important to make sure the people are sharp. Not everyone’s eyes will be nice and sharp if you are setting up a group shot with an aperture of f/2.8. Take this image below for example where I’ve taken a shot of two people on the lowest aperture my lens would go (f/2.8). Notice only one of the models faces are in sharp focus? This is because the blond haired model tilted her head somewhat back further in distance than the other. It wasn’t long before I noticed my error and adjusted my aperture to f/4 using the rules listed above.
2 people portrait
Why not simply set a high aperture to start with?
The higher you set your aperture number, the more detail you’ll see in the photo. This isn’t always good for portrait photography. Wrinkles, pimples and other unwanted blemishes will suddenly appear multiplied. The secret to being a great portrait photographer is to hide such imperfections.
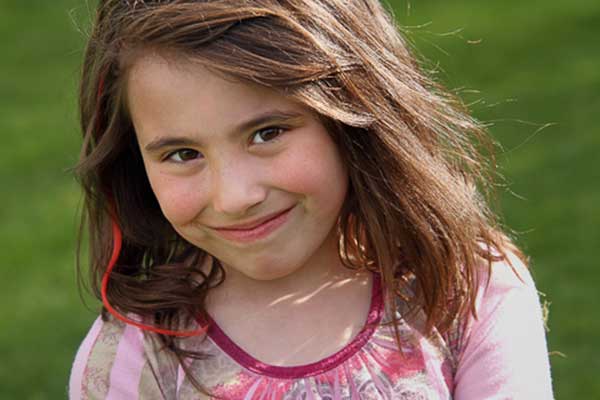
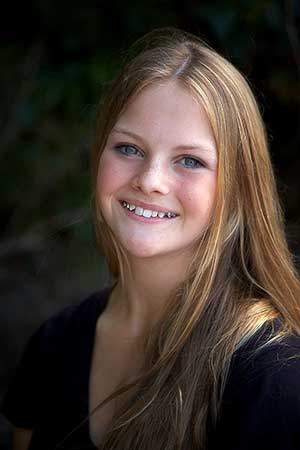
Personally I always aim for sharp eyes, but softness in other areas.  Take this photo that I shot of a teenage girl below for example.
portrait photography example image
For this image I set the lowest aperture my lens would allow. Notice her eyes are nice and sharp, yet there is also softness seen in her right shoulder and shoulder blade. Sharp, yet soft at the same time, with no harshness. The lower aperture number also knocked out the background by creating a nice blur, isolating the subject. This particular portrait was taken mid afternoon on a beach. We found a nice dark area with dense tree cover overhead. The background was created from the darkness of shrubs seen further in from where the girl was sitting.
Quick run down on those basic rules again
One person, use the lowest aperture setting your lens will allow.
Two or three people, set an aperture number f/4.
Four or more / group shots, set f/5.6 aperture.
Keep it simple and you’ll never have any problems photographing portraits!

Tips for selling stock photography

Tips for selling stock photography


Firstly what is stock photography?
Stock photography (also called micro-stock or micro-payment photography) generally refers to images that are uploaded to an agency, so they can be added to a photo library for others to purchase. The photographer makes a commission per sale, anything between 25 cents and five dollars, or more depending on the agency. Stock photography is normally in reference to selling images on your own website or larger paying agencies such as Getty Images or Alamy. Whereas microstock or micro payment photography are subscription based agencies such as Shutterstock, Dreamstime, or istockphoto to name a few, where the photographer will receive a smaller profit over a longer time.
For example, I've made several hundred dollars from this photo of a water droplet shown below through Getty Images. They saw it on my flickr account and requested the image for their clientele and has now sold several times, giving myself anywhere between $60 and $150 profit each time. Keep in mind their clientele are normally magazine publishers and those willing to pay a higher price for republishing your images. Sales from these types of agencies are often few and far between but when they do happen they pay well.
photo of water drop sold through Getty Images

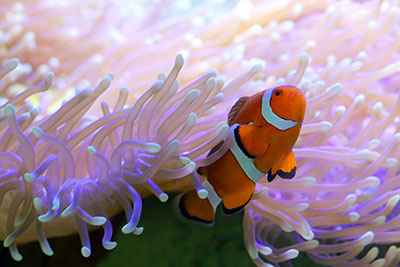
Now lets look at an example of an image that sells well across all microstock agencies. Yes that's right, little Nemo (photographed in an aquarium) is a popular image selling almost daily on one microstock site or another. The difference being, with microstock agencies the photographer usually only makes between thirty cents to five dollars per sale. Buyers are offered subscriptions allowing them to download many images per month for very little cost. When someone from a microstock subsciption makes a purchase, the photographer usually gets as little as 25 cents (depending on other factors). However, these sales happen more often so as the photographer you reap the benefit over a longer period of time.
most popular image sold in microstock

At this stage you are thinking gees that's not very much money! At first this may not seem like a lot, however it's important to keep in mind that a single photograph could possible sell thousands of times over, making you a very neat profit. Imagine getting 25 cents every time you press your cameras shutter button!

Is stock photography still worth it?

Reading forums and photography blogs, there seems to be a lot of negativity recently when it comes to stock photography. Photographers aren't getting as much profits as they were several years ago. So your next question might be, is stock photography still worth it or how much money do you make from stock photography? In my personal opinion it is definitely still worth your time and effort.
Here are the reasons why:
  • Lets face it, how many images do you have sitting on a hard drive somewhere that no one looks at? Why not have them sitting on several stock sites with the potental of earning you extra residual income. I can tell you now, residual income is awesome! You upload the images once and reap the rewards for years.
  • How many images do you have sitting on free photo galleries like flickr or 500px? Why not upload them to microstock websites instead and earn extra income. In my experience microstock communities are just as fun and friendly as flickr and 500px if you enjoy the social aspect of mixing with other photographers. I find this especially true with Dreamstime community.
  • If you are new to stock photography you won't be comparing profits with those from several years ago. You'll be comparing them with going from zero dollars to a couple of hundred dollars or more per month across a dozen stock sites. In my experience if you have one thousand images on eight to twelve of the top microstock agencies you'll make roughly $500 per month. Now I don't know about you, but $6000 extra income per year for me means a new camera, a few professional lenses, a high quality photo printer with a years supply of inks and fine art papers. That sure beats uploading them to free photo galleries!
example of big stock seller

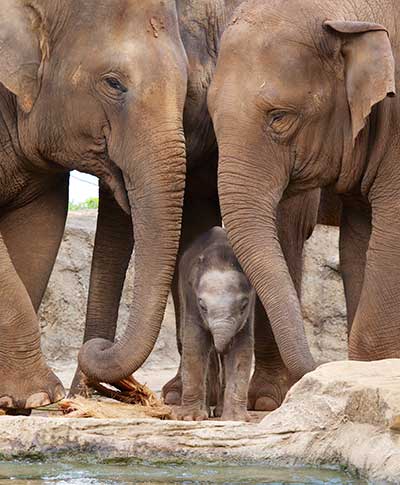
This image above is a great example of a photo that sat on my hard drive for years and now sells every few days. It was an image I'd forgotten about until looking through old photographs a few month ago. I also have several other images selling well from the same trip to the zoo. Stock photography doesn't necessarily mean professional shots set up with white backgrounds. Often the best sellers are those you shoot in every day activities. 


Stock photography tips

After submitting photographs to twelve different stock agencies, this is what I've learned so far about selling microstock.
  • Submit your photographs to more than one stock agency. There is no reason to limit yourself to only one microstock site. They all have different customer bases who will be searching similar keywords. I find if an image sells well in one agency, it will also sell well in another. Imagine the sales I'd have lost if I limited myself to only one microstock site. Also photographs that are rejected by one agency, can be accepted and sold well by another. It doesn't take long to realize what each agency likes and doesn't like.
  • There are many reasons why an agency may reject an image. Just because an agency rejected your photo, doesn't mean it was a bad image. Most agencies will give an explanation for the rejection. However don't take this personally or become disheartened. A good example of this is the water drop seen at the start of this page. It sells well on Getty Images for a high price, yet microstock sites like Dreamstime or Shutterstock who sell images much cheaper rejected the image when I submitted it. One said the image wasn't focussed enough on the droplet, the other said they already had enough of that specific subject in their database.

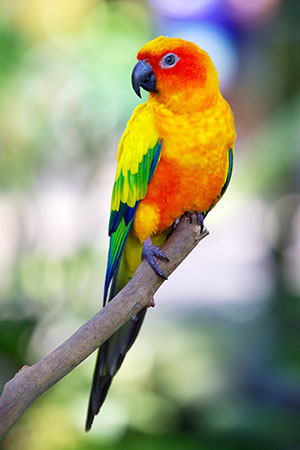
    As a photographer you can also learn a great deal from rejections. For example, this image of a bird below was rejected by a couple of agencies who all gave the same reason. Looking at the photo in a smaller size it looks perfectly focussed and sharp. However, when viewing the bird photo in it's full resolution it's clear to see the eye is hazy and the focus is on the birds body, not its eye. Lesson being, eyes need to be in sharp focus. I also learned that I should view photos in their full resolution before submitting them.


    bird photo


    If you have any doubt about sharpness seen in the photo, I suggest resizing the image to the lowest resolution accepted by the microstock agency. In other words, don't submit the full resolution. Minimising file sizes also increases sharpness. I've had images that were initially rejected due to sharpness, I resized them to smaller resolutions and then successfully resubmitted.
  • Check your photographs in their full size for noise. Noise refers to grainy or pixilated area's found within some photos. Any images that contain noise are usually rejected by stock agencies. The best way to stop noise from appearing within your photographs, is to set your digital SLR camera to its lowest ISO. However, sometimes this is not possible depending on the lighting situation.

    So how do you get grainy photos accepted by stock agencies? First you need to minimise the grain by using software such as Definehttp://www.niksoftware.com/nikcollection/usa/dfine.html which is part of the Nik collection. There are many other similar software available.

    If you own Photoshop you can also use the blur tool to rub over grainy areas which minimises the chance of stock agencies rejecting the image.

    As with sharpness, resizing images to a smaller size also helps with noise reduction seen in the photo.
  • If you are submitting insect or flower images, use their scientific name as well when adding keywords to help increase sales.
  • Don't crop photographs too tight (if at all) so there is some space for buyers to add text if needed. Often publishers who purchase your images, will want to use them for posters or full page advertising. Therefore, they need space for words and quotes. I've found images with space, are more easily accepted by stock agencies and sell better than those cropped tightly.
  • Don't upload too many photographs of the same theme, otherwise they may be rejected. For example, just because an acency has accepted one of your highrise buildings, it doesn't mean they want another seven from different angles.
  • Most agencies have enough photographs of flowers and pets. It's always best to check out their list of 'wants' and 'don't wants'. Each agency will differ in the types of photo's they need and don't need.
  • The more photographs you submit, the more money you make. Those that submit 400 photographs, make more money than those who submit 50. If you intend on making a living from stock photography, then you should be treating it like a full time job.